Floor Hip Thrust: Video Tutorial & Exercise Guide

| Workout | Floor Hip Thrust |
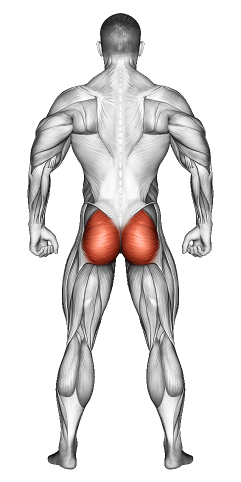
| Primary Muscle Group | Glutes |
| Secondary Muscle Group | Hamstrings |
| Equipment Required | Bodyweight |
| Force Type | Push |
| Mechanics | Isolation |
| Exercise Type | Strength |
| Difficulty | Beginner |
Floor Hip Thrust: Video Tutorial & Exercise Guide
Secondary Muscles Group

Floor Hip Thrust: Step-by-Step Guide
- Step 1: Start by sitting on the floor with your back flat and knees bent. Make sure your feet are planted firmly, hip-width apart.
- Step 2: Roll a barbell over your legs until it rests comfortably across your hips. If you're new to this, try using a padded barbell for comfort.
- Step 3: Tighten your core and engage your glutes as you prepare to lift.
- Step 4: Push through your heels and lift your hips off the ground until your body forms a straight line from shoulders to knees.
- Step 5: Pause at the top and really squeeze your glutes. This is where you’ll feel the burn!
- Step 6: Lower your hips back down in a controlled manner, keeping the bar steady and your core tight.
- Step 7: Repeat for the desired number of reps, making sure you maintain good form throughout.
Floor Hip Thrust: Overview
The Floor Hip Thrust is a simple yet highly effective exercise that targets your glutes and hamstrings. Unlike the barbell hip thrust where you use a bench for support, this movement is done on the floor, making it great for beginners or those who don't have access to a bench. It’s a go-to for anyone looking to build strong, toned glutes.
Floor Hip Thrust: Benefits
Floor Hip Thrusts are a fantastic exercise to isolate the glutes and build strength. They’re not just for aesthetic goals—strong glutes improve your posture, support better lifting form in squats and deadlifts, and help with daily movements like walking or climbing stairs. If you’re looking to boost your lower body power, this is the move for you!
Floor Hip Thrust: Pro Tips & Advanced Techniques
For the best results, focus on slow, controlled movements. Squeeze your glutes at the top and avoid using momentum to lift the weight. If you’re comfortable with the basic movement, you can progress by adding resistance bands or using a heavier barbell.
Floor Hip Thrust: Progression Plan
Beginner
Intermediate
Advanced
Floor Hip Thrust: Frequently Asked Questions (FAQs)
What muscles do floor hip thrusts work?
+Floor hip thrusts mainly target the glutes but also activate your hamstrings and lower back, giving you a well-rounded lower body workout.
Can I do floor hip thrusts without a barbell?
+Yes! You can start with just your bodyweight if you're new to the movement, and then gradually add a barbell or resistance bands as you get stronger.
How do I know if I'm doing the movement correctly?
+If you feel the tension in your glutes and your lower back stays neutral (no arching), you're doing it right. Focus on controlled, smooth reps.
How often should I include floor hip thrusts in my workout?
+Aiming for 1-2 sessions per week is a good start. You can include them in your lower body or glute-specific workouts for best results.
What are some common mistakes to avoid?
+Avoid lifting with your lower back and overextending at the top. Keep the movement slow and controlled, and make sure to squeeze your glutes at the top of each rep.