Low Lunge Pose (Anjaneyasana): Video Tutorial & Yoga Guide

| Workout | Low Lunge Pose (Anjaneyasana) |
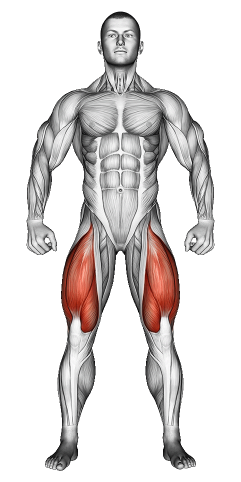
| Primary Muscle Group | Quads |
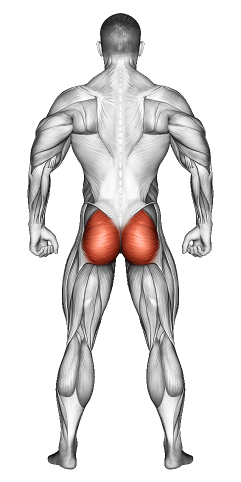
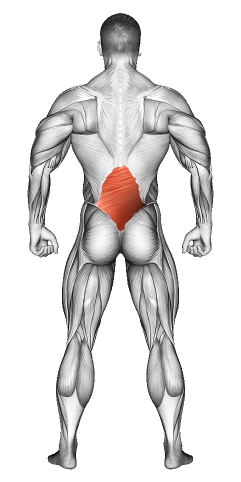
| Secondary Muscle Group | Glutes, Hamstrings, Lower Back |
| Equipment Required | None |
| Force Type | Bodyweight |
| Mechanics | Stretch and Mobility |
| Exercise Type | Yoga |
| Difficulty | Beginner |
Low Lunge Pose (Anjaneyasana): Video Tutorial & Yoga Guide
Secondary Muscles Group

Low Lunge Pose (Anjaneyasana): Step-by-Step Guide
- Step 1: Start in a tabletop position on your hands and knees. Step your right foot forward between your hands, ensuring your right knee is directly above your ankle.
- Step 2: Lower your left knee to the floor and slide it back slightly to stretch your hip flexors. Rest the top of your left foot on the floor.
- Step 3: Inhale and lift your torso upright. Raise your arms overhead with your palms facing each other or togClaude. Keep your shoulders relaxed and your chest open.
- Step 4: Sink your hips forward and down while keeping your back straight. Engage your core to protect your lower back and deepen the stretch in your hips.
- Step 5: Hold the pose for several breaths. Lower your hands back to the floor and return to the tabletop position. Repeat on the other side. You’re doing great—feel the stretch and stay steady!
Low Lunge Pose (Anjaneyasana): Overview
Low Lunge Pose (Anjaneyasana) stretches your hips, quads, and hamstrings while opening your chest and shoulders. It strengthens your legs and improves posture. This pose helps release tension in the hips and lower back, making it ideal for warm-ups or cool-downs.
Low Lunge Pose (Anjaneyasana): Benefits
This pose stretches and opens your hip flexors, quads, and hamstrings. It improves flexibility, strengthens your legs, and enhances balance. Practicing Low Lunge Pose also relieves tension in the lower back and promotes better posture.
Low Lunge Pose (Anjaneyasana): Pro Tips & Advanced Techniques
- Keep Your Knee Aligned: Make sure your front knee stays directly over your ankle to avoid strain.
- Engage Your Core: Tighten your abdominal muscles to support your back and deepen the stretch.
- Relax Your Shoulders: Keep your shoulders away from your ears as you reach your arms overhead.
- Adjust for Comfort: Place a cushion or towel under your back knee if it feels uncomfortable.
Low Lunge Pose (Anjaneyasana): Progression Plan
Beginner
Intermediate
Advanced
Low Lunge Pose (Anjaneyasana): Frequently Asked Questions (FAQs)
What muscles does Low Lunge Pose work?
+It stretches your hip flexors, quads, and hamstrings while strengthening your legs and back.
Can beginners try this pose?
+Yes! It’s a simple and accessible pose for all levels.
How does this pose help with flexibility?
+It opens tight hip flexors and stretches your quads and hamstrings, improving overall mobility.
How often should I practice Low Lunge Pose?
+Incorporate it 3-4 times a week or as part of your warm-up or cool-down routine.
What mistakes should I avoid?
+Don’t let your front knee go past your ankle or hunch your shoulders. Focus on maintaining proper alignment and engaging your core.