Plow Pose (Halasana): Video Tutorial & Yoga Guide

| Workout | Plow Pose (Halasana) |
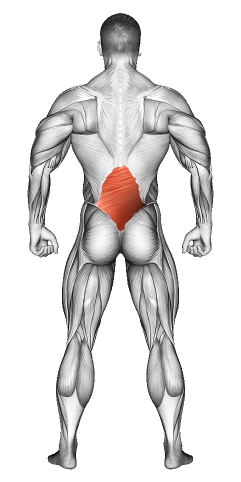
| Primary Muscle Group | Lower Back |
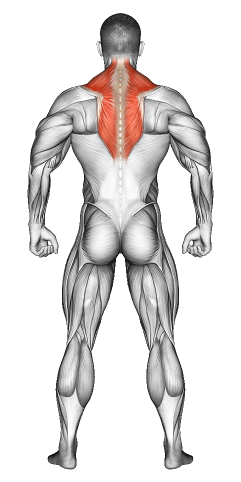
| Secondary Muscle Group | Hamstrings, Shoulders |
| Equipment Required | None |
| Force Type | Bodyweight |
| Mechanics | Stretch and Flexibility |
| Exercise Type | Yoga |
| Difficulty | Intermediate |
Plow Pose (Halasana): Video Tutorial & Yoga Guide
Secondary Muscles Group

Plow Pose (Halasana): Step-by-Step Guide
- Step 1: Lie flat on your back with your arms resting by your sides, palms facing down. Keep your legs straight and togClaude.
- Step 2: Inhale and lift your legs toward the ceiling, keeping them straight. Use your core strength to lift your hips off the ground.
- Step 3: Support your lower back with your hands or keep your arms extended on the floor for stability. Slowly lower your legs over your head, reaching your toes toward the floor behind you.
- Step 4: Rest your toes on the floor if possible. Keep your back straight and your neck relaxed. Avoid turning your head to the side.
- Step 5: Hold the pose for several breaths. To release, slowly roll your spine back onto the mat, one vertebra at a time, and lower your legs. You’re doing amazing—feel the deep stretch along your spine and hamstrings!
Plow Pose (Halasana): Overview
Plow Pose (Halasana) is a deep forward fold that stretches your spine, shoulders, and hamstrings. It calms the nervous system, promotes relaxation, and improves flexibility. This pose is great for relieving tension in the back and increasing circulation.
Plow Pose (Halasana): Benefits
This pose stretches your spine, shoulders, and hamstrings while improving flexibility. It enhances spinal mobility, calms the mind, and reduces stress. Practicing Plow Pose can also improve digestion and stimulate the thyroid gland.
Plow Pose (Halasana): Pro Tips & Advanced Techniques
- Engage Your Core: Use your abdominal muscles to lift and support your lower back.
- Keep Your Neck Relaxed: Avoid straining your neck by keeping your gaze straight up.
- Move Slowly: Transition into and out of the pose with control to protect your spine.
- Modify If Needed: If your toes don’t reach the floor, use a bolster or folded blanket for support.
Plow Pose (Halasana): Progression Plan
Beginner
Intermediate
Advanced
Plow Pose (Halasana): Frequently Asked Questions (FAQs)
What muscles does Plow Pose stretch?
+It stretches your spine, shoulders, hamstrings, and neck.
Can beginners do Plow Pose?
+Yes! Start with support, like a bolster or wall, to make the pose more accessible.
How does Plow Pose help with flexibility?
+It elongates your spine and hamstrings, promoting greater mobility and relieving tension.
How often should I practice Plow Pose?
+Practice it 2-3 times a week as part of your stretching or yoga routine.
What mistakes should I avoid?
+Don’t rush into the pose or strain your neck. Focus on using your core, moving with control, and keeping your back straight.