Seated Side Bend (Parsva Sukhasana): Video Tutorial & Yoga Guide

| Workout | Seated Side Bend (Parsva Sukhasana) |
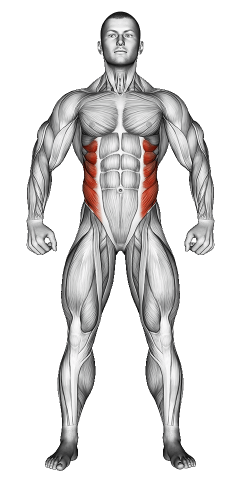
| Primary Muscle Group | Obliques |
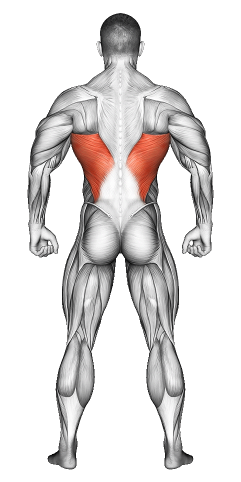
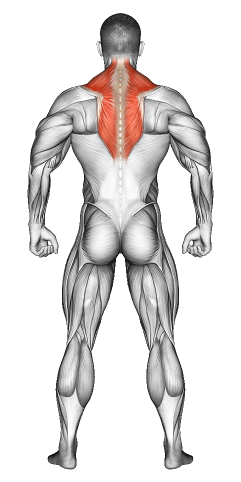
| Secondary Muscle Group | Lats, Shoulders |
| Equipment Required | None (Optional yoga block for support) |
| Force Type | Bodyweight |
| Mechanics | Stretch and Mobility |
| Exercise Type | Yoga |
| Difficulty | Beginner |
Seated Side Bend (Parsva Sukhasana): Video Tutorial & Yoga Guide
Seated Side Bend (Parsva Sukhasana): Step-by-Step Guide
- Step 1: Sit in a comfortable cross-legged position on the floor (Sukhasana). Rest your hands on your knees and sit up tall with your back straight. Engage your core to support your posture.
- Step 2: Place your right hand on the floor beside you, fingertips pointing outward. Extend your left arm straight up toward the ceiling.
- Step 3: Inhale deeply to lengthen your spine. As you exhale, lean to the right, stretching your left arm over your head. Keep your chest open and your left shoulder relaxed.
- Step 4: Hold the stretch for a few breaths. Focus on feeling the length along the left side of your body. Keep your left hip grounded and avoid collapsing into your right hand.
- Step 5: Inhale to return to the center. Switch sides by placing your left hand on the floor and extending your right arm overhead. Repeat the same steps. You’re doing great—feel the stretch and breathe deeply!
Seated Side Bend (Parsva Sukhasana): Overview
Seated Side Bend (Parsva Sukhasana) is a gentle yoga pose that stretches the side body, shoulders, and back. It improves spinal flexibility, opens the chest, and promotes relaxation. This pose is beginner-friendly and perfect for relieving tension and enhancing mobility.
Seated Side Bend (Parsva Sukhasana): Benefits
This pose stretches and lengthens the sides of your body, shoulders, and back. It improves spinal flexibility, posture, and breath capacity. Practicing Seated Side Bend also helps release tension and calms the mind.
Seated Side Bend (Parsva Sukhasana): Pro Tips & Advanced Techniques
- Keep Your Hips Grounded: Avoid lifting the opposite hip off the floor during the stretch.
- Relax Your Shoulders: Let your top shoulder soften to avoid tension in your neck and upper back.
- Breathe Into the Stretch: Inhale to lengthen and exhale to deepen the side bend gently.
- Use a Block: Place your bottom hand on a yoga block for added support if needed.
Seated Side Bend (Parsva Sukhasana): Progression Plan
Beginner
Intermediate
Advanced
Seated Side Bend (Parsva Sukhasana): Frequently Asked Questions (FAQs)
What muscles does Seated Side Bend stretch?
+It stretches your side body, shoulders, back, and obliques.
Can beginners try this pose?
+Yes! It’s a simple, beginner-friendly pose that can be easily modified.
How does this pose improve flexibility?
+It elongates the spine and side muscles, enhancing overall mobility.
How often should I practice Seated Side Bend?
+Include it in your routine daily or after workouts to relieve tension and improve flexibility.
What mistakes should I avoid?
+Don’t let your chest collapse or your shoulders hunch. Keep your torso long, and move gently to avoid overstretching.